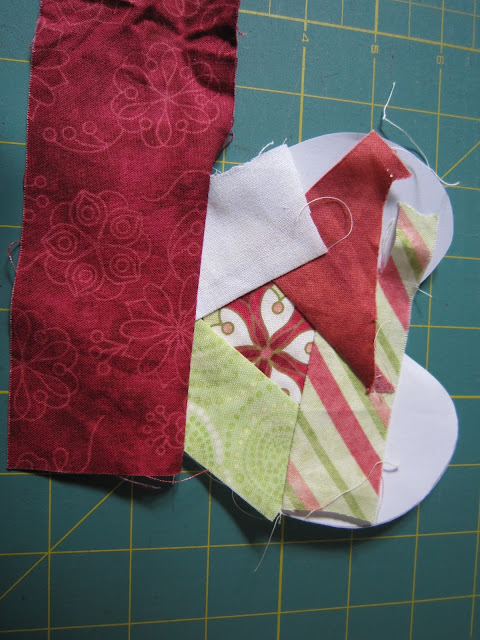
I'm back with my first tutorial of this New Bloggers week! Today, I'm going to show you something very simple - stitch and flip to make crazy shapes. It's a great way to use tiny scraps.
Firstly, prepare you shape. The easiest way to do this is by folding a sheet of paper in half and drawing half of your shape:
There we go, a perfectly symmetrical shape! I advise using the crappiest, lightest paper you can find for this, and reduce your stitch length down - I went from 2.5 to 1.
Place your first fabric in the centre. I usually start with a motif of some kind.
Position your next fabric on top, and sew 1/4" from the edge.
Fingerpress open
and continue around. Note how I'm not necessarily using the initial shape, but cutting off different angles. Here's how I worked out to the edge:
Work out until you have covered your paper template. Tear off the paper (that's the fun bit!)
There are a couple of little shreds of paper left, I wasn't too bothered about those. Position right sides together with your backing fabric, inserting your ribbon (ric rac here)
This is how I prepped the points - trim across, and taper into the point. For innies, snip in as close to the point as possible. On curves, clip little 'v's.
Turn, press, and sew up. I use a ladder stitch, which is what I use to sew up anything like this, to sew binding on, EPP, even for applique when the edges are turned in. It's the most common hand sewing stitch I use!
Use matching thread where possible - here I'm using a contrast to show you. Knot your thread, and bring it up, starting where the machine stitching is still holding. This means that any difference between the machine sewing and hand sewing is minimised.
Inset the needle on the other fabric directly opposite where you came out. Make a short stitch under the fold.
Here's how little this stitch shows! The trick is to keep the thread relatively taut, and, as above, as close to where your needle emerged as possible. So much better than a whip or slip stitch!
Hopefully you can see how this little technique can be adapted to a variety of shapes! I made a star and Christmas tree out of festive fabrics (my mum loves Christmas fabric, I have more scraps than I can possible ever use!). I've made smaller hearts in the past, expressly to use the tinier scraps. You can insert lace or ric rac, use decorative stitches on your machine or embroidery. You can use this technique to make the shape, then use fusible interfacing to adhere and use as appliqué.


Oh Eleanor, these are just too cute. Thanks for another "squirrel" as in "Oh look! Squirrel!" and off I go in another direction... Great tutorial. I am now, thanks to Sharon Schamber's Binding Angel tutorial on YouTube, using the ladder stitch for absolutely everything. You'll have to tell me how you got the cute pins for social media...the Pinterest one took me into a 5-page or so vortex...more squirrels!
ReplyDeleteI made my christmas cards one year using this technique . Easy to do at lunch time
ReplyDelete